Imagine biting into something warm, gooey, and just a little wildthat’s Cheesy Dynamite Chicken Buns. They’re trending fast on TikTok and Pinterest, and for good reason. Ramen-seasoned chicken, crushed Doritos, melty cheese… what’s not to love? Most of the ingredients are pantry staples, making this an easy prep option that bakes up golden and irresistible.
This fun, flavor-packed fusion feels like a warm hug wrapped inside a bun. Think shredded chicken seasoned to perfection, spicy notes, creamy cheddar, and a fluffy, buttery bun holding it together. It’s pure comfort food, made with minimal fuss and maximum payoff. Get the full step-by-step below!
I grew up surrounded by spice jars and cast iron pans, helping break up bread for Sunday stuffing and sorting bulk-bin treasures at the local co-op. So when I say I’ve tested this recipe thoroughly, I mean it. A small twist here, a shortcut there all to nail that balance of flavor and simplicity. Plus, there’s one little secret ingredient tucked inside you’re going to love.
Why You’ll Love These Cheesy Dynamite Chicken Buns
These buns are the ultimate blend of cozy and bold flavors. Picture this: a soft, slightly buttery bun stuffed with juicy, flavorful chicken and topped with melty, cheesy goodness. It’s everything you crave in a comfort food with a hint of spice to keep things interesting. Here’s why they’ll become your favorite:
- Perfect for sharing: Whether it’s a game day or a cozy dinner, this recipe serves a crowd (14 portions!).
- Prep ahead: You can make the dough or chicken filling early, making weeknight assembly a breeze.
- Nostalgic yet exciting: Feels like a warm hug, but that cheesy chicken dynamite twist takes it up a notch.
- Beginner-friendly: Don’t be intimidated the steps are simple, and I’ve got your back.
Breaking Down the Ingredients
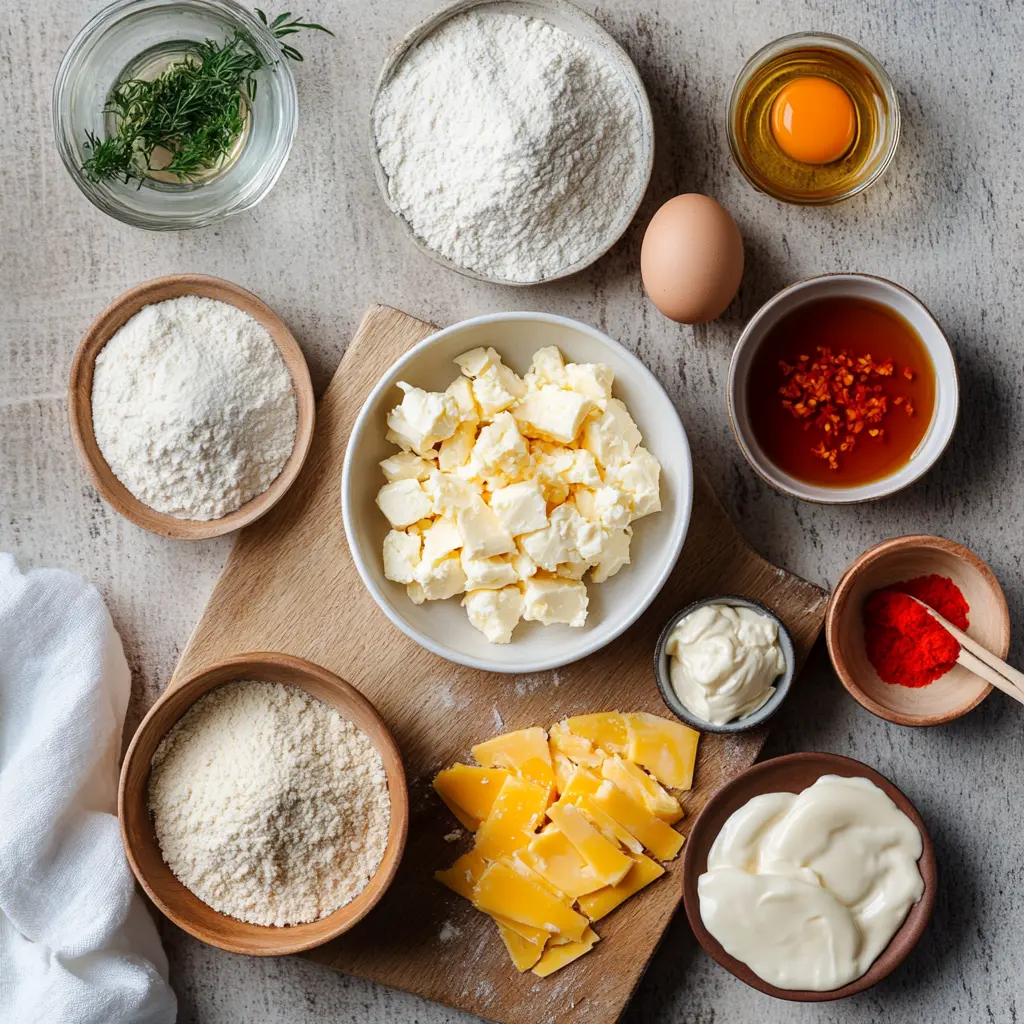
Let’s keep it easy and practical for shopping. Here’s what you’ll need for each component of the recipe:
| Component | Ingredients |
|---|---|
| Dough | Warm water, warm milk, honey, instant yeast, egg, sunflower oil, all-purpose flour, salt, unsalted butter |
| Chicken Mixture | Cooked chicken fillet (boiled or pan-seared), sambal oelek, soy sauce, egg, salt, onion powder, garlic powder, cayenne powder, ground black pepper |
| Topping | Grated Parmesan cheese, cayenne powder, onion powder, freshly cracked black pepper |
| Sauce | Mayonnaise, sweet chili sauce, sambal oelek (adjust for spice preference) |
Pro Tip: Don’t worry if you’re missing a spiceuse what you have. Even a few substitutions won’t take away from the overall flavor bomb!
Making the Buns: Step-by-Step
This recipe has a few parts, but each part is straightforward and rewarding. Here’s the play-by-play:
- Make the dough: In a large mixing bowl, combine warm water and milk (around 105°F). Stir in honey and yeast. Let it sit until frothy, about 5–10 minutes. Add in the egg and sunflower oil. Gradually mix in flour and salt, then knead until soft and elastic, about 10 minutes. Add butter at the final kneading stage until fully incorporated. Cover and let the dough rise in a warm spot for 1 hour or until doubled in size.
- Cook the chicken: Combine chopped or shredded cooked chicken with soy sauce, sambal oelek, spices, and a beaten egg. Cook for 5–7 minutes over medium heat until slightly thickened and fragrant. Cool before assembling.
- Assemble: Divide the dough into 14 equal pieces. Roll each into a disc and fill with 1–2 tablespoons of chicken mixture. Pinch to seal and shape into smooth buns with the seam-side down.
- Add toppings: Brush each bun with milk or egg wash. Sprinkle with Parmesan cheese and spice mix for that cheesy, flavorful top crust.
- Bake: Arrange buns on a parchment-lined baking tray. Bake at 350°F (175°C) for 20–25 minutes until golden brown and fragrant.
Note: Take advantage of dough rise time to prep your filling. It keeps things efficient and your kitchen cozy with delicious aromas.
Timing Made Easy
| Step | Time Needed |
|---|---|
| Making the dough | 20 minutes + 1 hour rise |
| Cooking the chicken | 20 minutes |
| Assembling the buns | 15–20 minutes |
| Baking | 20–25 minutes |
| Total | 2.5 hours (including rise time) |
Serving & Storing Your Buns
These Cheesy Dynamite Chicken Buns are best served warm from the oven when the cheese is melted and the bun is soft and golden. Here’s how to make the most of them:
- Perfect pairings: Balance the richness with crisp sides like a green salad, tangy pickles, or roasted vegetables.
- Leftovers: Store any leftover buns in an airtight container or wrap in foil. Keep refrigerated for up to 3 days.
- Reheating: Rewarm in a 325°F oven for 8–10 minutes to restore warmth and texture without drying them out. Avoid microwaving to preserve that buttery exterior.
| Storage Method | How Long? |
|---|---|
| Room Temperature | 4–6 hours (best consumed same day) |
| Refrigerator | Up to 3 days |
| Freezer | Up to 1 month (wrap each tightly in plastic and foil) |
Pro Tip: Freeze filled but unbaked buns for easy prep. When ready, bake straight from frozen at 350°F, adding 5–7 minutes to the baking time.
Expert Insight: The Science Behind Cheesy Dynamite Chicken Buns
Cheesy Dynamite Chicken Buns strike a balance of textures creamy melted cheese, moist shredded chicken, and springy dough that’s irresistible. The secret is keeping the filling thick enough to avoid sogginess, while baking the buns until the crust seals the flavor inside. That contrast between crunchy topping and melty center? Science meets comfort food perfection.
For more delicious recipes and cooking inspiration, follow me on Facebook, Pinterest and Reddit!
Making My Cheesy Dynamite Chicken Buns Just Right
After plenty of trial and error from under-seasoned fillings to overbaked bottoms I finally found the formula for the best Cheesy Dynamite Chicken Buns. Each version taught me something, and I’ve rolled all those delicious lessons into this final recipe. It’s the kind of cozy snack you’ll want on repeat, trust me!
FAQs ( Cheesy Dynamite Chicken Buns )

Conclusion
These Cheesy Dynamite Chicken Buns come together in around two and a half hoursmost of it hands-offand deliver melty, savory goodness in every bite. Your kitchen will smell heavenly as they bake, and the end result is totally worth it.
Customize the spice level, explore gluten-free flour, or sub in your favorite cheese. Leftovers reheat well or freeze nicely unbakeda tip I borrowed from seasoned meal-preppers. Whether it’s a quick snack or party-ready appetizer, these buns are flexible, delicious, and destined for repeat rotation.
Try them out and let me know how yours turned out! Did they remind you of a favorite from family get-togethers? Share your photos and inspire someone else to fall in love with this cozy classic too!

Cheesy Dynamite Chicken Buns: Easy and Irresistible!
Ingredients
Method
- In a large bowl, combine water, milk, honey, and instant yeast; let it activate for 5 minutes.
- Add egg, sunflower oil, flour, salt, and butter; knead until a smooth dough forms.
- Cover and let the dough rise for 1 hour or until doubled in size.
- Meanwhile, prepare the chicken mixture by finely dicing or mincing chicken filet.
- Mix chicken with salt, onion powder, garlic powder, cayenne powder, black pepper powder, sambal oelek, soy sauce, and egg.
- In a separate bowl, combine cornstarch, salt, black pepper powder, and onion powder; coat the chicken mixture evenly.
- Form the chicken into small portions for the buns.
- Once the dough has risen, punch it down and divide into 14 equal pieces.
- Flatten each dough piece and place a portion of chicken mixture inside; seal to form buns.
- Place buns seam side down on a baking tray lined with parchment paper.
- Prepare the topping by mixing Parmesan cheese, cayenne powder, onion powder, and black pepper powder.
- Brush the buns lightly with milk and sprinkle the cheesy topping over them.
- Preheat oven to 180°C (350°F).
- Bake the buns for 20-30 minutes until golden brown and cooked through.
- While baking, prepare the sauce by combining mayonnaise, chili sauce, and sambal oelek in a bowl.
- Serve the buns warm with the spicy sauce on the side for dipping.
Notes
- For extra crunch, add crushed Doritos on top before baking. Store leftovers in an airtight container and reheat before serving.


